
Adding Sequences

Our web-based software is FREE with no sign-up so you may use it as many times as needed for your cabling project.

From any link on our websites in the USA, Canada, UK, and South America, the opening page will show you a basic Tutorial, Tips, and FAQ to help you with your cable labels. On this page, we run through the operation of each area.
Once you have the page open, please click on the NEW TEMPLATE to open the next window.
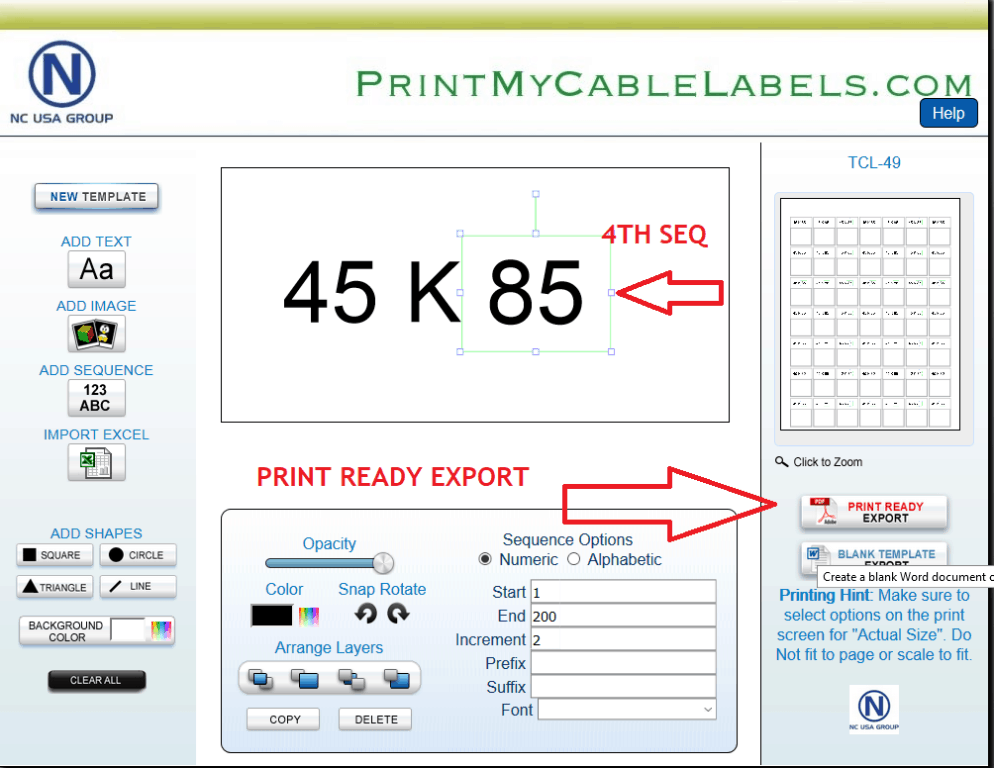
Select the ADD SEQUENCE button, which will show the first sequence in the top right, You can drag and size the box for the first sequence to the size and place you need.
Note in the SEQUENCE panel at the bottom right you have two options, Numeric or Alphabetic, with the start sequence box and the end.

Most will have the default of Increments of 1, but you can do this if required to meet your numbering system for your cable labels.
You can add as many ADD SEQUENCE as you need, just press the button each time. You can also switch between numbers and letters for each SEQUENCE, then you can make your labels with both patch panel reference and cable numbers.
In the area for SEQUENCE, you can also select uppercase letters, type of font, and numbers or letters.
Sequencing is done by clicking on the button that has 123 ABC. Once the new object is added you will notice additional options will show up in the toolbox below the canvas. You have options for Numeric or Alphabetic. You may set your start, end, and increment. Also, you will be able to define the prefix and suffix of the sequence to allow for customization. You are able to add as many sequences as you would like to your project.

You can add 3rd and sequence using the same method above, an idea is that you can also skip increments which is great for when you are numbering cable labels for patch panels, which can be split over and under, this way you can print the top row cable labels (1,3,5,7,9, etc) the software will do the rest.
In the second row you set the start # at 2 and the end number at 99, that way the numbers for the cable labels will be in the bottom row order (2,4,6,8, etc)
You can mix and match each sequence to meet your application.
When you have your labels ready, make sure the size and the font are correct.
All printers will be different so make sure you make a lineup sheet of labels before the final print run with the cable labels.
You can download any test sheets from our website at the following link. Test Pages
Please note that do not leave the web page open with no activity as your cookie may time out and your work will be lost if you have not saved it to a PDF document.
When you are ready to press PRINT READY EXPORT this will produce a PDF of your work for printing or send to the site for your techs to use on-site.
Note if you have 49 labels on the sheet and your work only goes to number 40 the software will repeat and auto-fill the last 9 labels.

Your PDF for your cable labels should look like this ready for printing.
This will need 5 sheets of labels please may sure the printer uses the TOP TRAY and the paper settings should be set to labels.